Maybe you just wanted to know how to make a cord . Then you found my article about it and perhaps I "happened" to show a "cord" in that article that wasn't twisted at all, but knotted using the tatting technique..? Welcome to the world of shuttle lace! :-)
Perhaps you’ve just finished my tutorial on throw rings and want to practice a bit more?
Or did you just land here by chance?
Whatever brought you here, make yourself comfortable, grab your yarn, and let's get started.
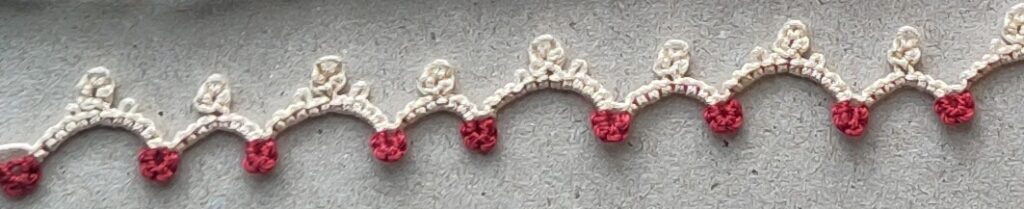
The little cord edging is a wonderful, subtle decoration or a special gift ribbon. It also works well as a base for a garland made of various small tatting motifs.
Techniques
Materials
- lace-weight mercerized cotton yarn No 10 (50 g = 280 m)
.
- Cream
- Red
- Two shuttles
- A crochet hook suitable for the yarn
- Scissors
You will find various sources for this yarn in my shop and product recommendations. Natürlich kannst Du für die Borte auch in andere Farben verwenden.
Abbreviations
| – | picot |
| ch | chain |
| tR | throw ring |
| R | ring |
Let’s tat
The rings are worked from the front side, and the chains are worked from the back. The work is turned between a ring and a chain (and vice-versa).
Wind Shuttle 1 with red thread and Shuttle 2 with cream thread. Work the simple rings with Shuttle 1 and the hanging rings with Shuttle 2.
*A: R 4
B: ch 4 tR(2 – 2) 4
C: R 4
D: ch 4 – 2 tR(2 – 2) 2 – 4
Ab * Repeat continuously from *
When the edging has reached your desired length, cut the threads and weave in the ends on the back. Wash the edging in lukewarm water with mild soap and gently iron it into shape.

What colors are you using for your edging? Feel free to leave a comment!