Welcome to the third part of my tatting basics course.
- Tatting Basics 1 - Flipping Knots and Your First Ring
- Tatting Basics 2 - Chains
- Tatting Basics 3 – Picots and Joining
After the second part about chains was rather easy, things get a little trickier again. This section is about picots and the dreaded joining. Picots are learned quickly, but it takes a lot of practice to make them evenly. Joining is (once again) theoretically very simple on paper. However, in three-dimensional practice with gravity involved, quite a few things can go wrong. Here I will explain how it works and how to overcome the most common difficulties.
What are picots and what is joining?
A picot is nothing more than a gap between two knots. When the knots are pushed together, the excess thread curves outward and forms a decorative loop. These loops can also be used to connect individual elements to each other. The process of connecting them is called Joining.
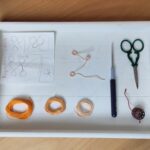
You will again need smooth cotton thread (for example crochet cotton No. 10 with a yardage of 280 m / 50 g).
You will find various sources for this yarn in my shop and product recommendations.
We will also use a suitable crochet hook (1.5–2 mm). If you have one, you can of course also use a shuttle with a hook.
For left-handers: The words “right” and “left” do not appear in the text. You can mirror the images using any image-editing software. The text will still match.
Whenever individual fingers are mentioned in the text, they always refer to the fingers of the holding hand (the left hand for right-handed people and the right hand for left-handed people).
First ring with a picot
Start with a simple ring and first make 6 double stitches.
Make the next second half stitch and let it flip. Then slide it toward the sixth double stitch, but hold it about 1 cm away from the double stitch with your thumb. Now make a normal first half stitch. Tighten it as usual close to the previous knot. The picot is now fixed in place.
Add one more double stitch and close the ring.

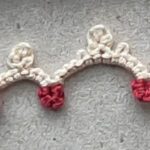
Second ring with joining
Begin another ring and first make 2 double stitches. Keep the ring on your fingers during the next steps so that nothing twists.
Make sure you can see the front side of the first ring. The picot should point toward the second ring. The ball thread runs away from the work to the side and does not cross any other thread.
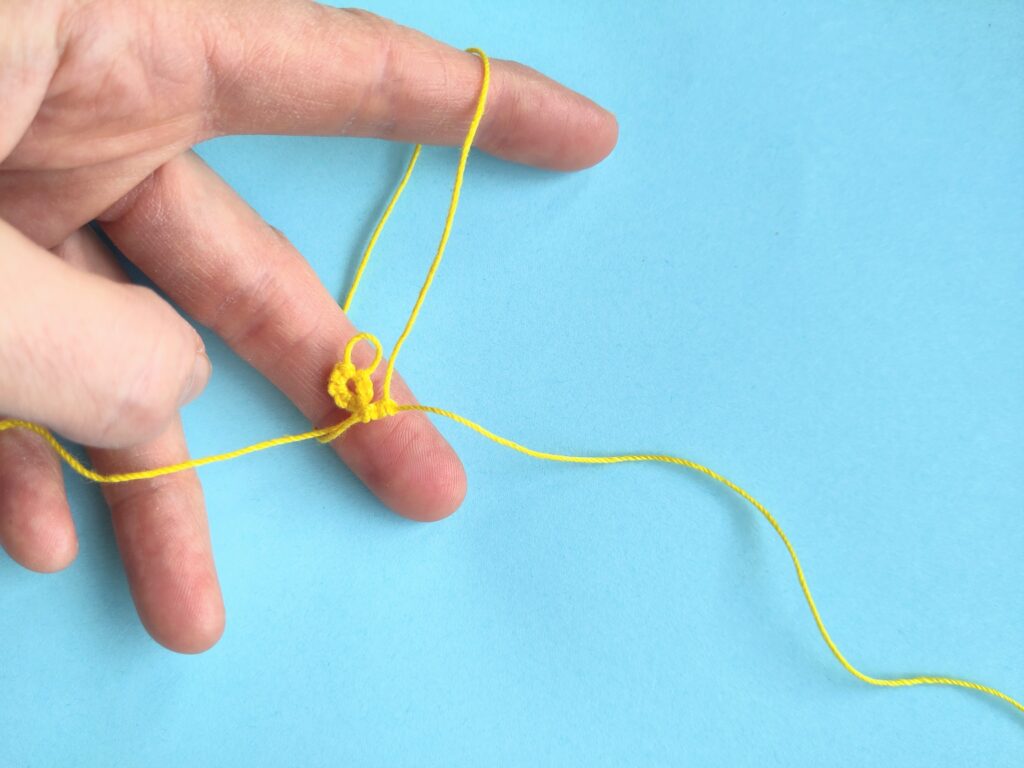
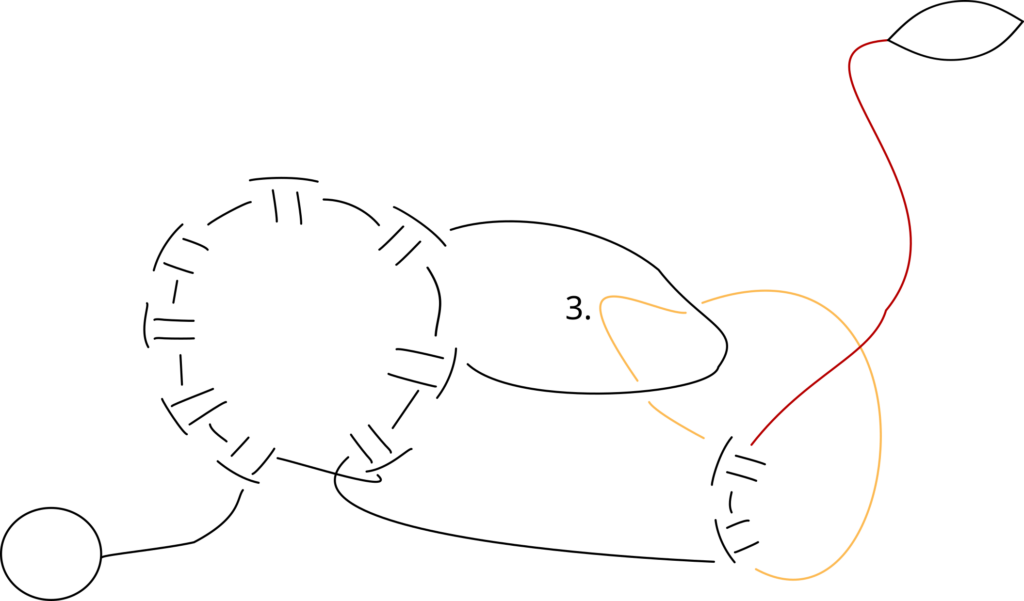
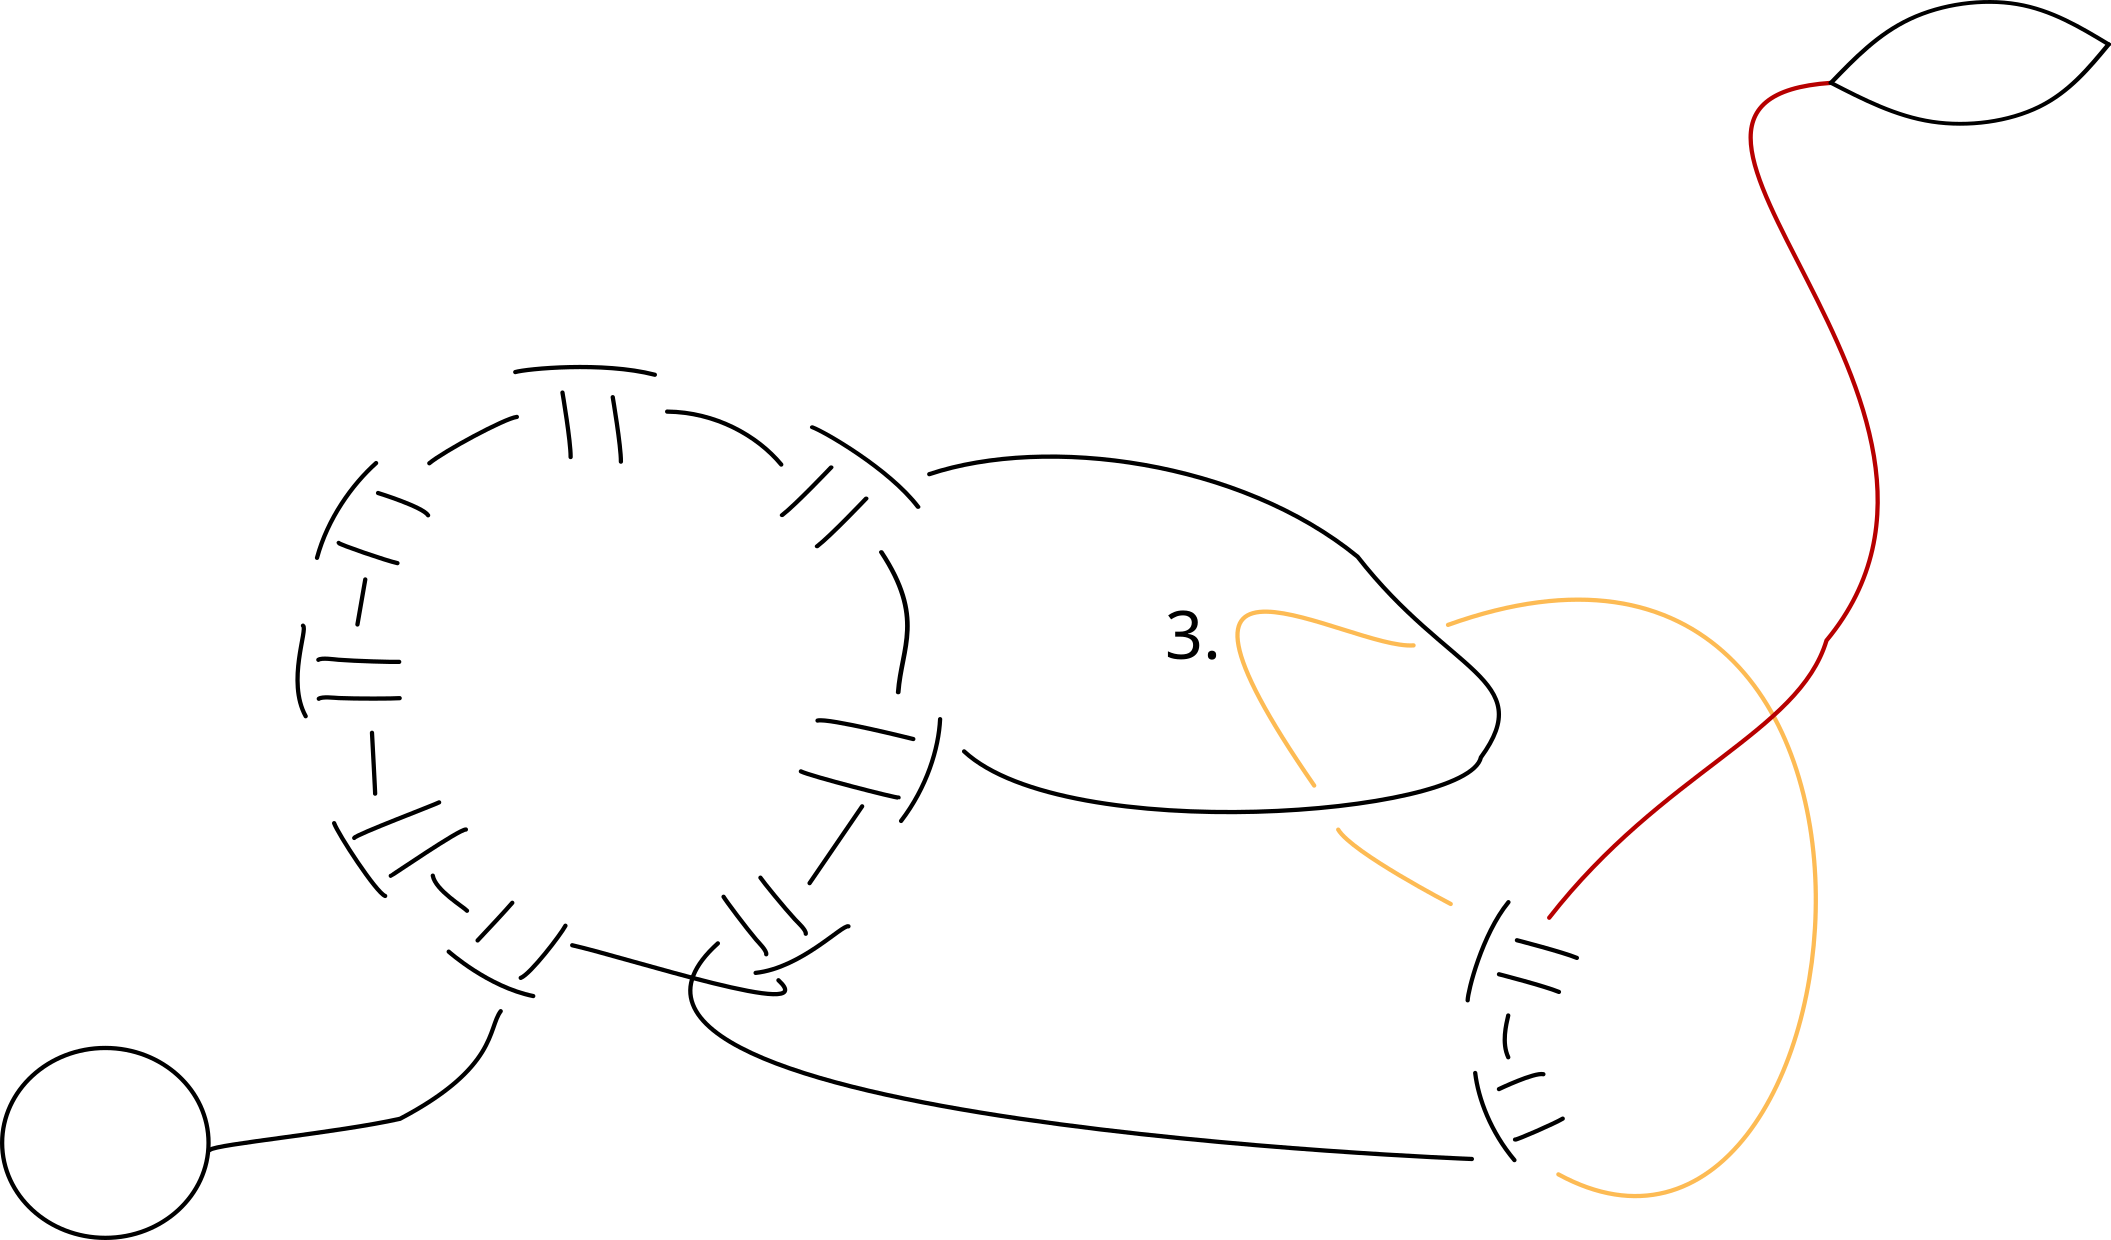
Pulling up a loop
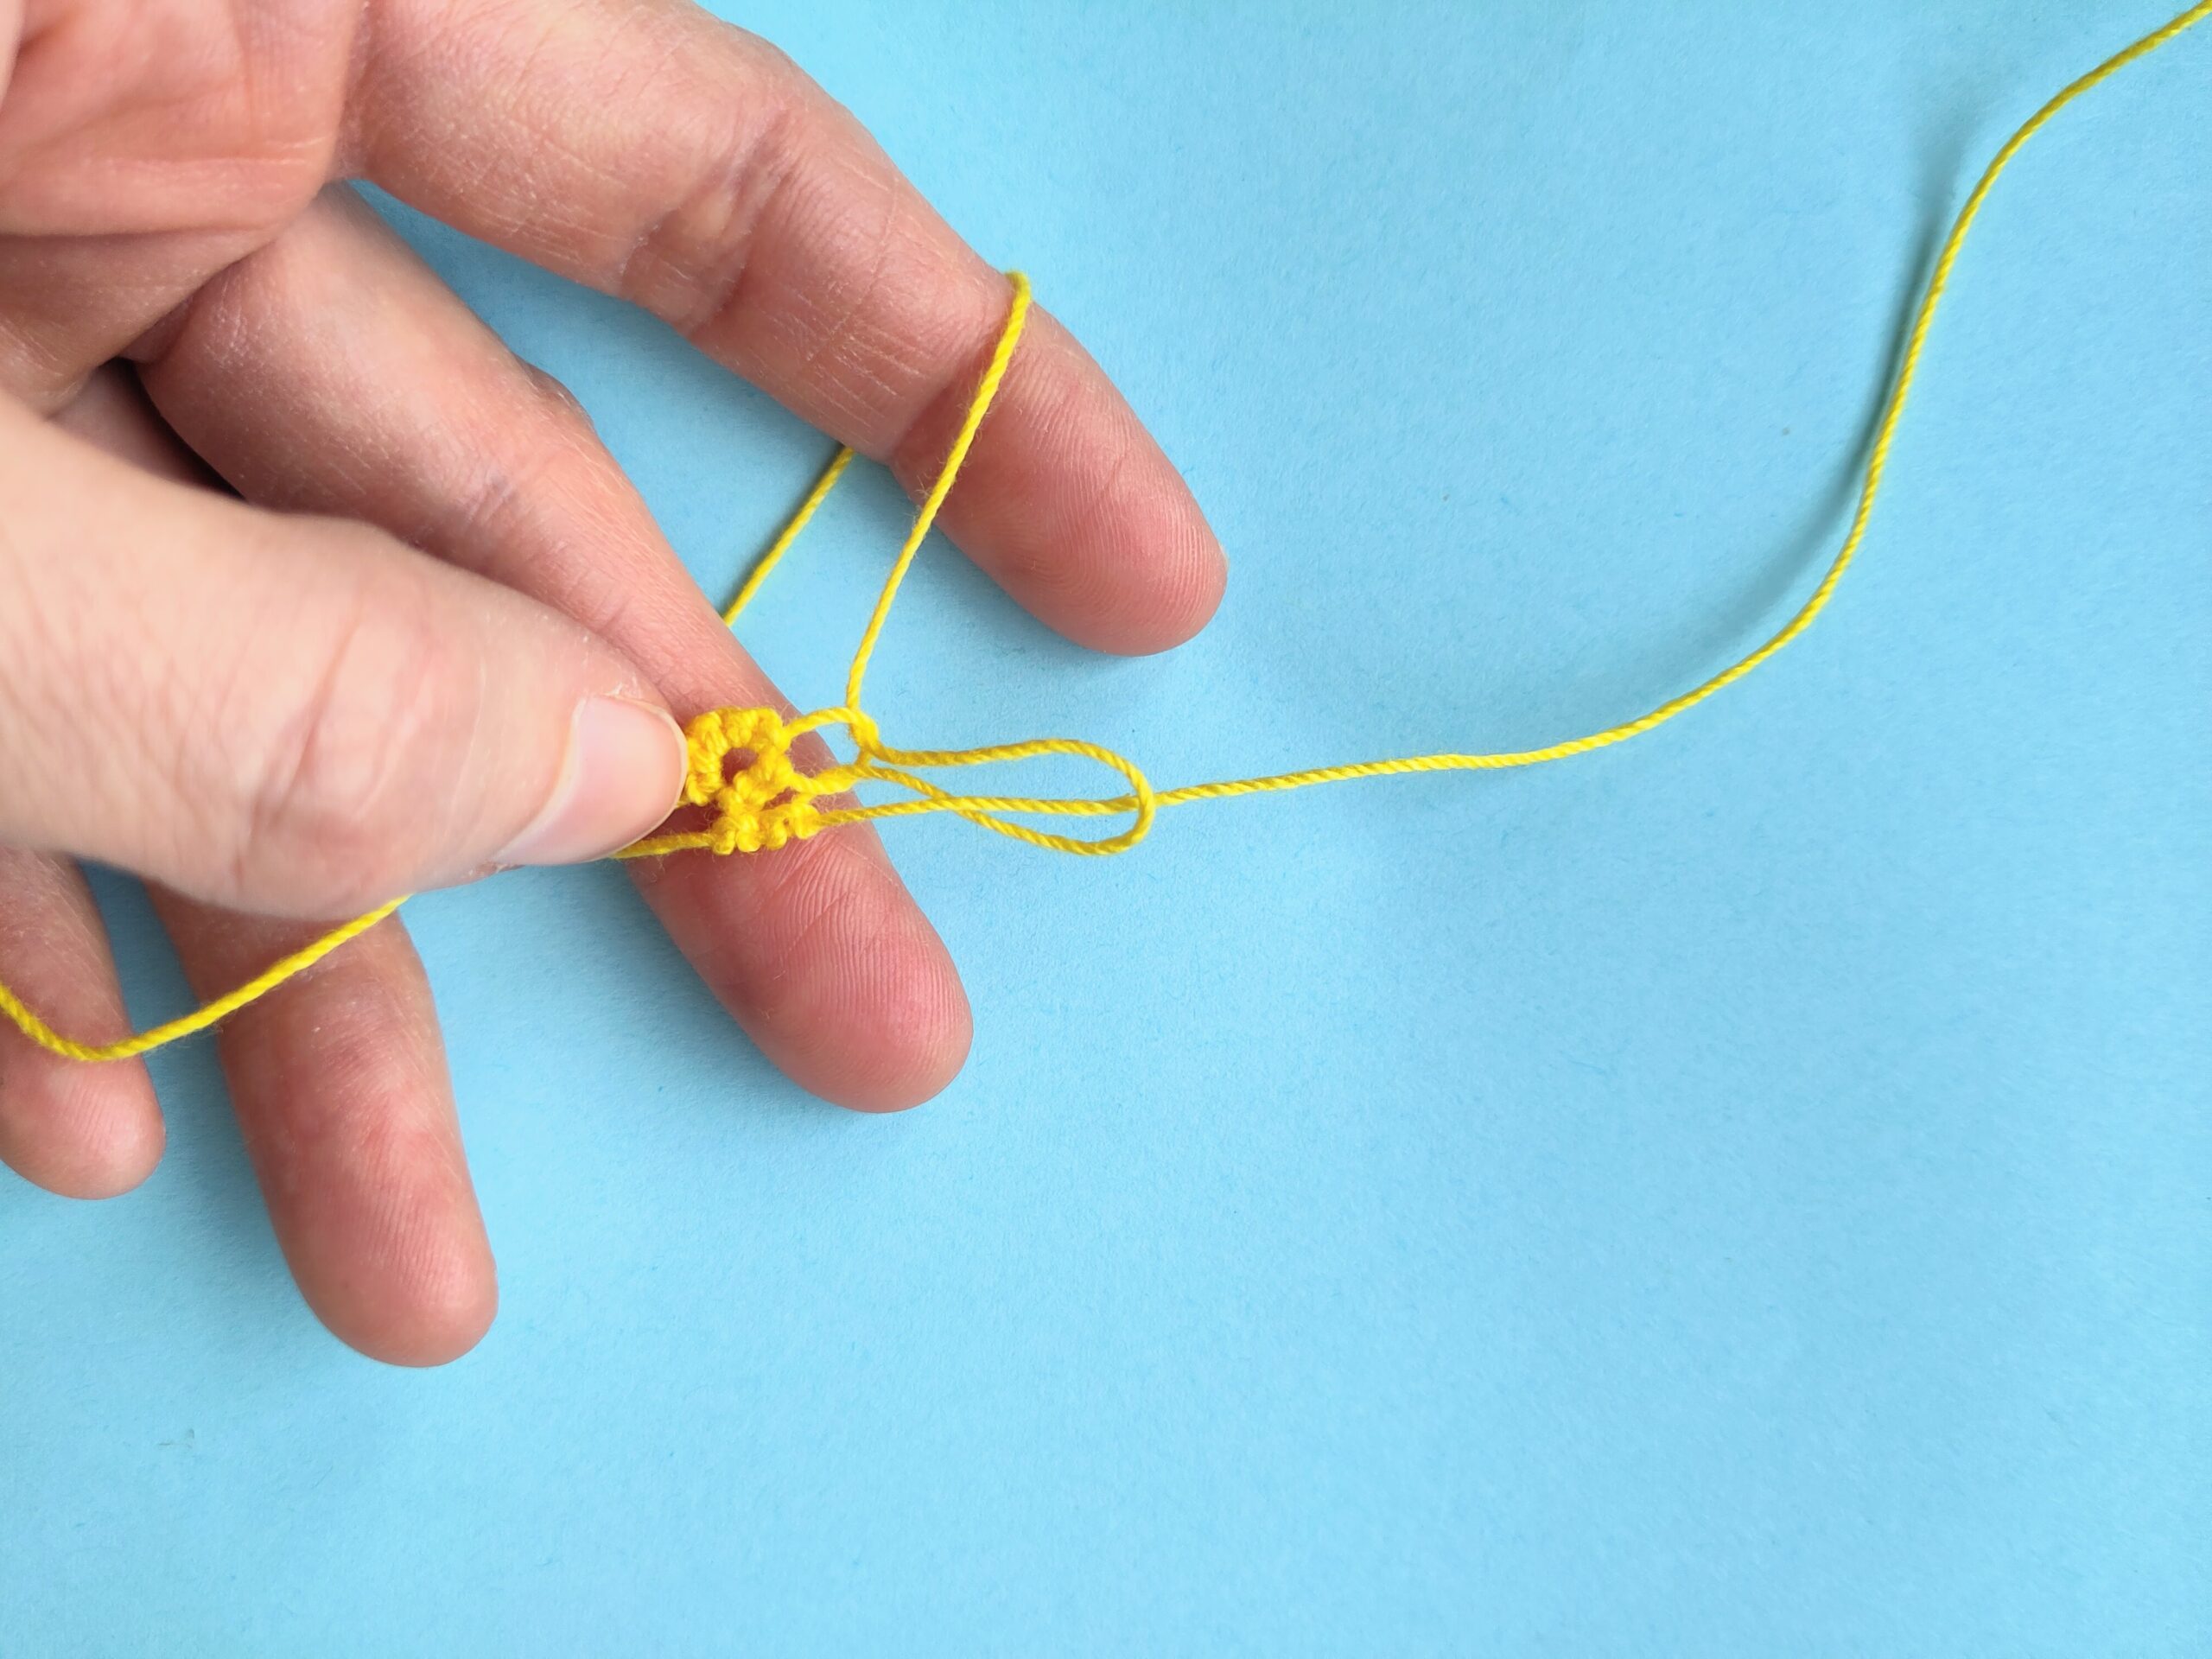
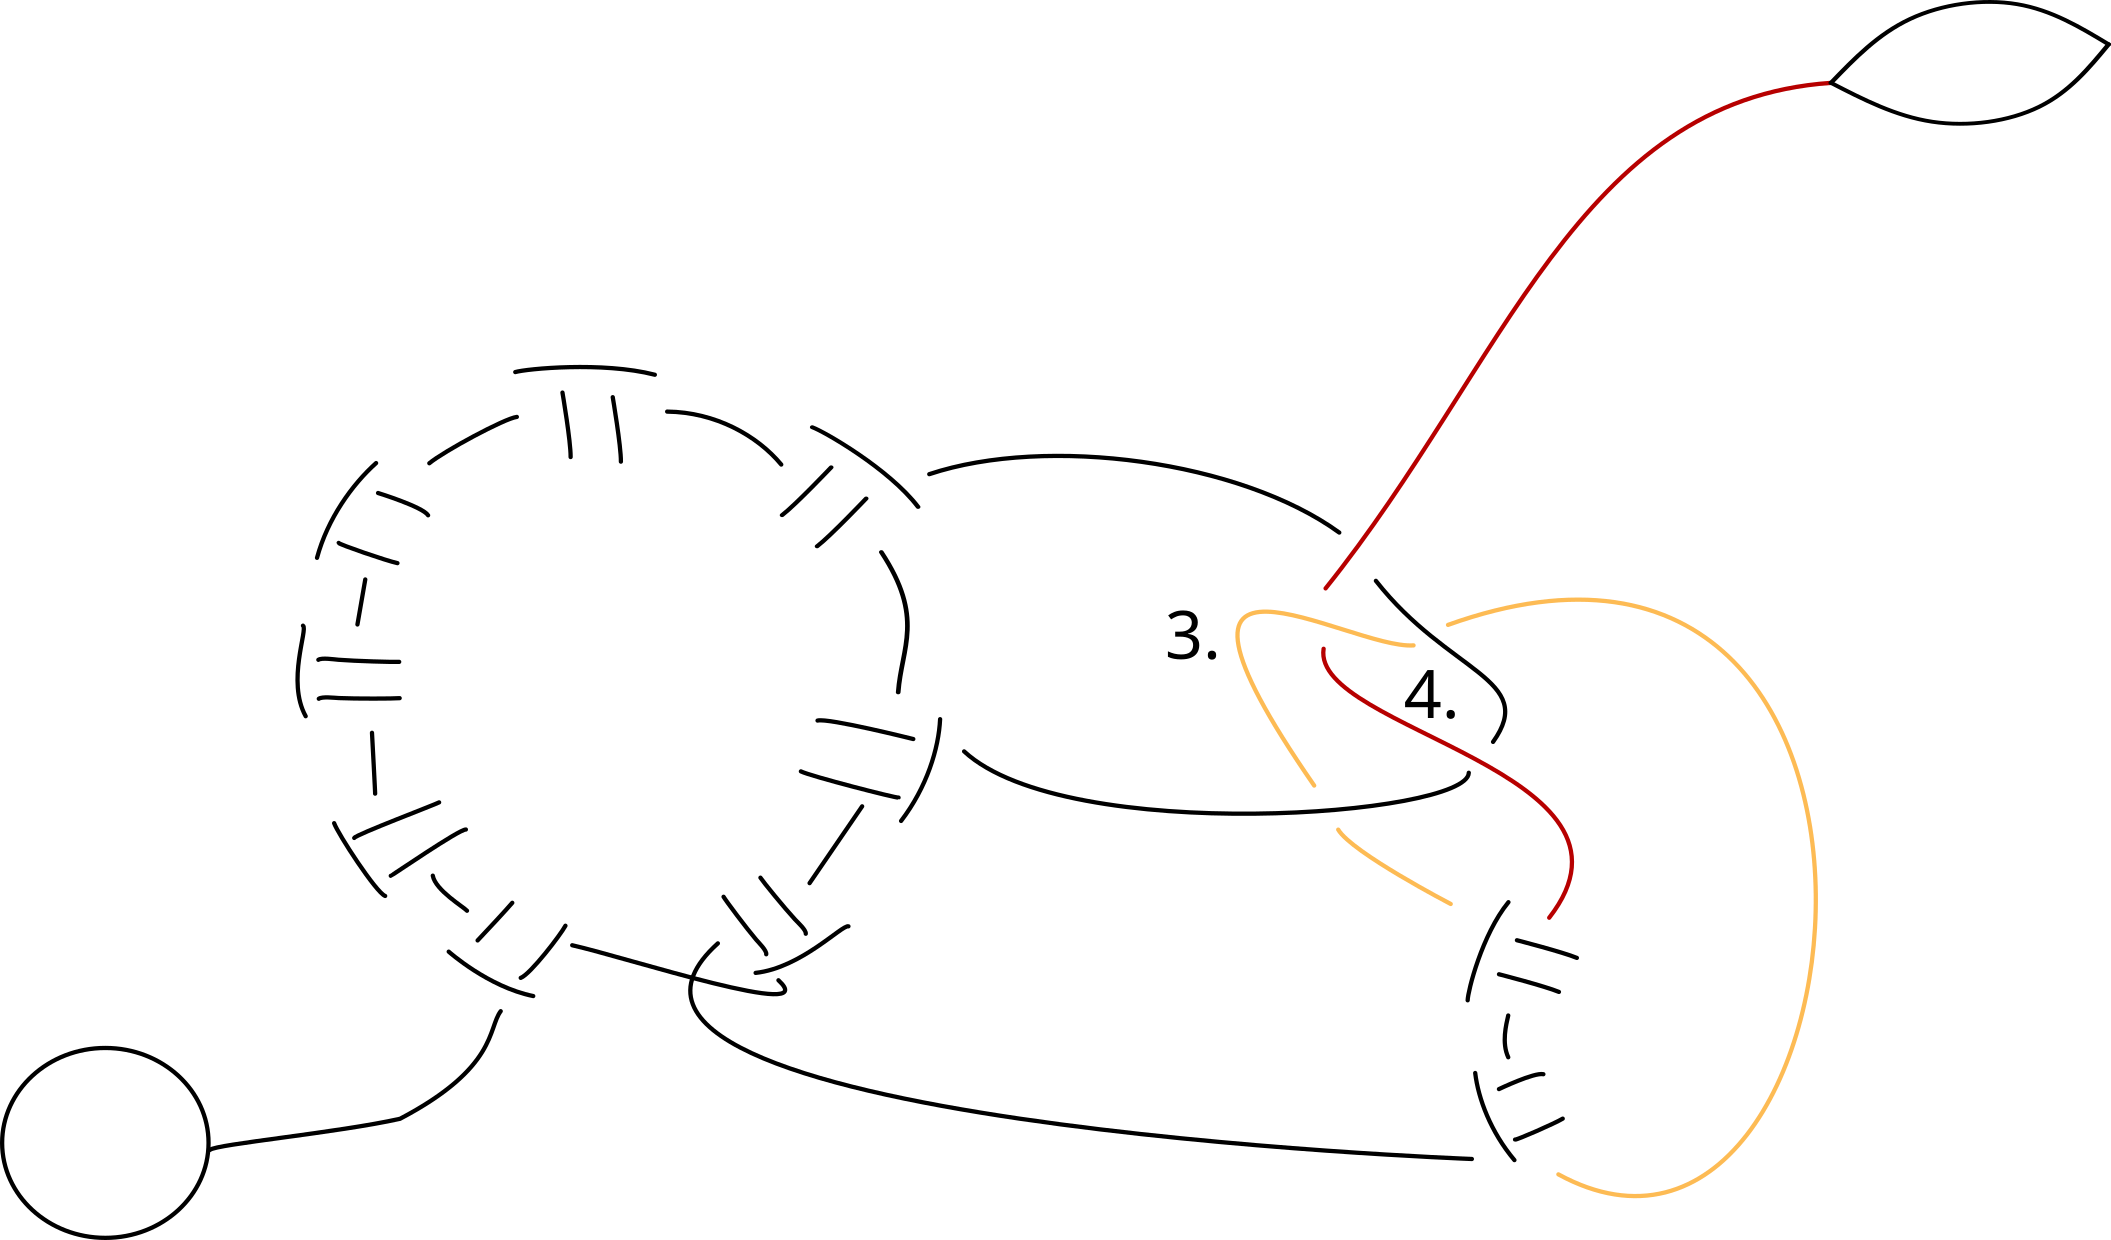
Insert your crochet hook into the picot and pull the inner thread (3.) through it.
(Our picot is relatively large so that you can clearly see what happens. With smaller picots the elements come closer together and the join becomes almost invisible.)

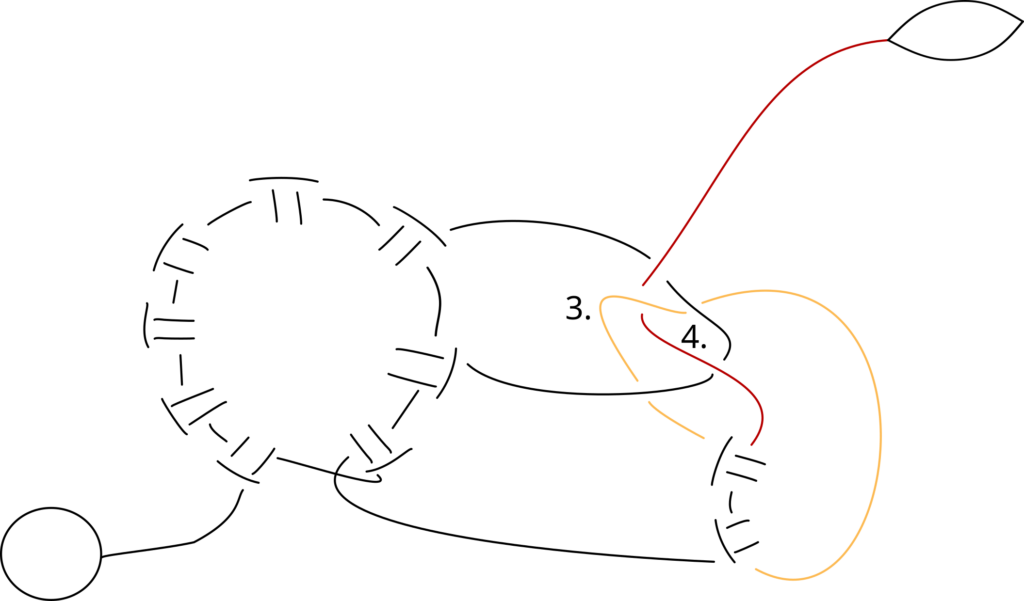
Passing the shuttle through
Push the shuttle thread (4.), starting from the knot, through the loop of the inner thread (3.).

Tightening the threads
This is the tricky part: First pull back the inner thread of the ring. Try to place the joining point close to the last knot. Then pull the shuttle thread tight. Ideally this brings the join even closer to the last knot.
If necessary, pull the inner thread again. Always pull the two threads alternately, never at the same time.
Checking your work
When tightening the threads, it can happen that the knot before the join flips back. Therefore, get into the habit of doing this small check after every join:
Keep the ring on your fingers and tilt your hand toward your body so that you see the back side of the ring. Enlarge the ring slightly by pulling a little of the inner thread out of the first knot.
If the thread moves easily, you can continue working.
If the thread does not move, you must undo the join, open the last knot, and make sure it flips correctly again. Otherwise you will not be able to close the ring at the end.
Chains and special cases
Of course, chains can also be joined to other elements. As long as there is a picot, it can be joined to.
It is also possible to join to the opening point of a ring. You may need this, for example, in the Balloon Trio Charlie pattern to close a round. Baloon Trio Charlie um eine Runde zuschließen.
The example above was chosen so that the picot clearly “offers itself” for joining. It sits directly next to the neighboring ring and even points toward the joining point. The first ring also does not need to be held because it is already connected to the second ring.
When working a piece in several rounds or rows and starting the new round with a new color, you may have to join two parts that were previously unrelated. In that case I place both parts flat on the table. I make sure both lie with the front side facing up and arrange all threads so that as few as possible cross each other. Then I join them while everything remains lying flat. Threads that try to get in the way can be weighed down with a book if necessary.
Practicing picots
Picots can be made in different sizes to create different effects. You will need to practice for a while to make them evenly.
You can use your thumb as a measuring guide or use a so-called picot gauge. This is a small tool that allows you to measure the length of the picot precisely.
You can also take a look at my article about maintaining flow while making picots. maintaining flow while making picots..
For practice, you can make rings with alternating 2 double stitches and one picot, trying to make all picots the same size. Or start with a large picot and make each following picot slightly smaller than the previous one (like a staircase).
How to make picots and join them
- First ring with a picot
Start with a simple ring and first make 6 double stitches.
Make the next second half stitch and let it flip. Then slide it toward the sixth double stitch, but hold it about 1 cm away from the double stitch with your thumb. Now make a normal first half stitch. Tighten it as usual close to the previous knot. The picot is now fixed in place.
Add one more double stitch and close the ring.
- Second ring with joining
Begin another ring and first make 2 double stitches. Keep the ring on your fingers during the next steps so that nothing twists. Make sure you can see the front side of the first ring. The picot should point toward the second ring. The ball thread runs away from the work to the side and does not cross any other thread.

- Pulling up a loop
Insert your crochet hook into the picot and pull the inner thread through it.
(Our picot is relatively large so that you can clearly see what happens. With smaller picots the elements come closer together and the join becomes almost invisible.)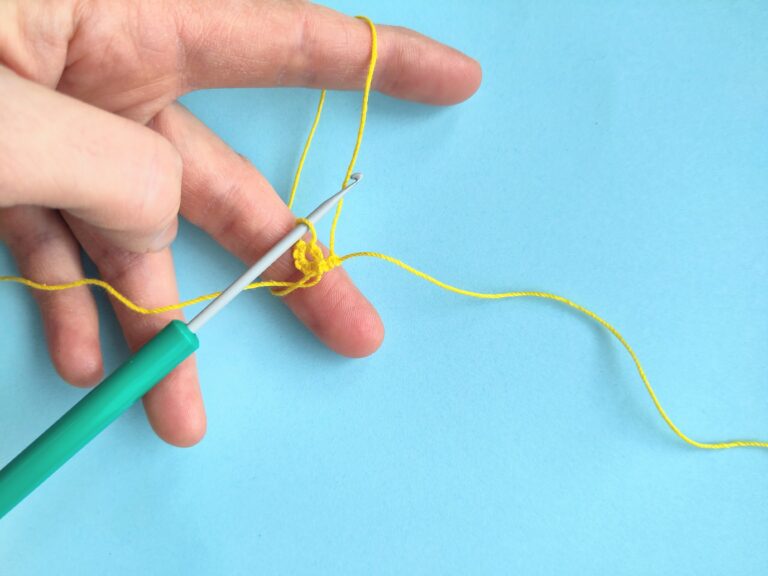
- Pulling up a loop schematic
Here is a schematic of pulling up the loop:
- Passing the shuttle through
Push the shuttle thread, starting from the knot, through the loop of the inner thread.
- Passing the shuttle through schematic
Here is a schematic of passing the shuttle through:
- Tightening the threads
This is the tricky part: First pull back the inner thread of the ring. Try to place the joining point close to the last knot. Then pull the shuttle thread tight. Ideally this brings the join even closer to the last knot.
If necessary, pull the inner thread again. Always pull the two threads alternately, never at the same time. - Checking your work
When tightening the threads, it can happen that the knot before the join flips back. Therefore, get into the habit of doing this small check after every join:
Keep the ring on your fingers and tilt your hand toward your body so that you see the back side of the ring. Enlarge the ring slightly by pulling a little of the inner thread out of the first knot.
If the thread moves easily, you can continue working. If the thread does not move, you must undo the join, open the last knot, and make sure it flips correctly again. Otherwise you will not be able to close the ring at the end. - Chains and special cases
Of course, chains can also be joined to other elements. As long as there is a picot, it can be joined to.
It is also possible to join to the opening point of a ring. You may need this, for example, in the Balloon Trio Charlie pattern to close a round. Baloon Trio Charlie um eine Runde zuschließen.
The example above was chosen so that the picot clearly “offers itself” for joining. It sits directly next to the neighboring ring and even points toward the joining point. The first ring also does not need to be held because it is already connected to the second ring.
When working a piece in several rounds or rows and starting the new round with a new color, you may have to join two parts that were previously unrelated. In that case I place both parts flat on the table. I make sure both lie with the front side facing up and arrange all threads so that as few as possible cross each other. Then I join them while everything remains lying flat. Threads that try to get in the way can be weighed down with a book if necessary. - Practicing picots
Picots can be made in different sizes to create different effects. You will need to practice for a while to make them evenly. You can use your thumb as a measuring guide or use a so-called picot gauge. This is a small tool that allows you to measure the length of the picot precisely.
You can also take a look at my article about maintaining flow while making picots. maintaining flow while making picots..
For practice, you can make rings with alternating 2 double stitches and one picot, trying to make all picots the same size. Or start with a large picot and make each following picot slightly smaller than the previous one (like a staircase).
How are picots and joins shown in patterns?
In patterns I represent a picot with a dash (-) and a join with a plus sign (+). I label the individual elements of a tatting piece alphabetically so that the joining point can be specified precisely.
In the following example, ring B should be joined to the picot of ring A:
A: R 6 - 2
B: R 2 +(to A) 6
In the example above the addition “(to A)” is actually unnecessary, because there is only one picot available for joining. So it could also be written like this:
A: R 6 - 2
B: R 2 + 6
In many patterns, chains and rings alternate evenly and each ring is joined to the previous one. In that case a simple + is sufficient.
In diagrams, picots are shown as a short straight line. In the following illustration you see a ring with three picots. The small arrow indicates where a pattern begins.

Our example from above appears in the next diagram. You can immediately see that picots and joining are involved because both rings show two numbers. The total of 8 double stitches is interrupted by the joining point. The join is the short straight line connecting the two rings. The thin curved line represents the thread between the rings.

Congratulations
Wow! My heartfelt congratulations. You now know the basics of tatting. You have shown perseverance and taught yourself something very special that not everyone can do.
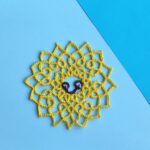
You can now, for example, already recreate the Baloon Trio Charlie pattern.
If you would like to learn more tatting techniques, take a look at these articles:
Did you enjoy the basic course? Feel free to leave me a comment.