In the tatting world, people often talk about the front and back of the work. Sometimes this is a bit exaggerated (who seriously checks afterward with a magnifying glass to see whether the knots are facing the right way?).
However, if we lose track of where our double stitches start or end and begin miscounting because of it, then it really is time to take a closer look at the sides of our work.
Some patterns simply say that you should turn the work, or that you should work from the front side or the back side. In my opinion, that is not enough to really understand what is going on. I wanted to understand exactly when a knot has to flip and when it should not in order to achieve a clean front side.
Let’s first take a look at our double stitch.
The Anatomy of the Double Stitch
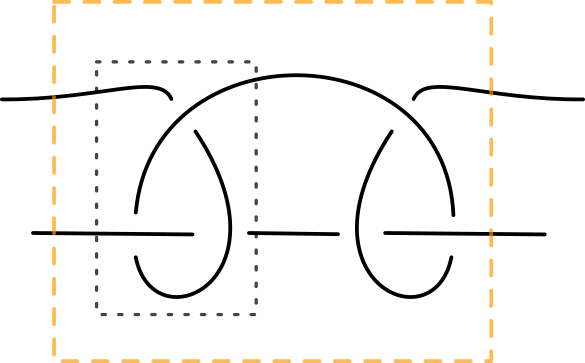
A double stitch consists of two half stitches. So far, so good.
This is what a double stitch looks like from the front side:
And this is what it looks like from the back side:
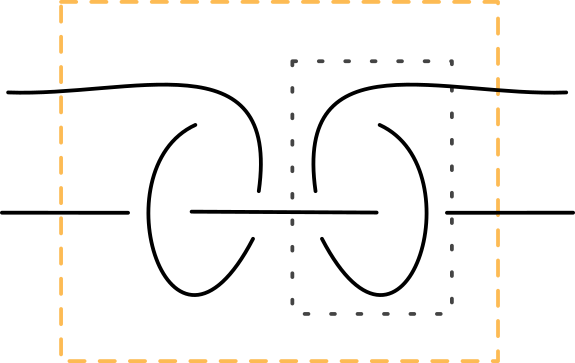
Viewed from the back, the knots are reversed. The back side also consists of double stitches, but they are shifted by half a stitch.
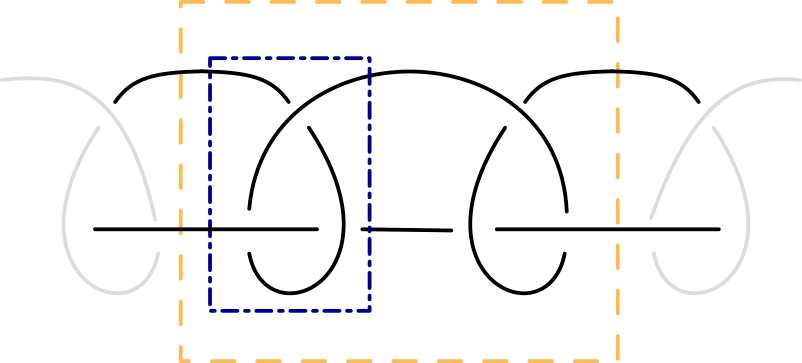
The “Switchers”
Dieses Vertauschen oder Verschieben passiert nicht nur durch das Wenden. Auch drunter oder drüber, springen oder nicht springen und die Wahl des Schiffchens haben den gleichen Effekt. Auch die Arbeitsrichtung, also ob die Elemente von link nach recht oder von rechts nach links entstehen ist solch ein „Vertauscher“.
Wenn wir zwei „Vertauscher“ kombinieren, heben sie sich gegenseitig auf. Es ist ein wenig wie mit + und – in der Mathematik. Hier mal ein paar Beispiele:
flipped under-stitch from the front side with shuttle 1
or
unflipped under-stitch from the front side with shuttle 1
→ reversed
flipped under-stitch from the front side with shuttle 1
or
unflipped over-stitch from the front side with shuttle 1
→ not reversedflipped under-stitch from the back side with shuttle 1
or
flipped under-stitch from the front side with shuttle 2
→ reversedHere is a summary of all the switchers:
- under or over
- flipped or unflipped
- shuttle 1 or shuttle 2
- front side or back side
- Arbeitsrichtung
How to Keep the Work the Right Way Around
My work automatically stays on the correct side because I always pick it up in such a way that no threads cross each other.
No matter how you hold the work, simple rings and floating rings automatically turn into the correct position because they hang from only one thread.
For chains and split rings, the shuttle thread and ball thread, or shuttle 1 and shuttle 2, must always point away from each other and must not cross. When they do that, the work is the “right way around”. This also turns the previous element into its correct position.
The important thing is that you continue with the correct knot and the correct shuttle.
Pure Logic
I always start simple rings with the shuttle thread (shuttle 1) and a flipped under-stitch. flipped under-stitch.
I also always start chains with the shuttle thread (shuttle 1), but with a flipped over-stitch.shuttle 1) und einem flipped over-stitch.
Because rings are made from the front side and chains from the back side, this results in a clean front side.
flipped over-stitch from the front side with shuttle 1
or

flipped under-stitch from the backside with shuttle 1
→ not reversed
Since the switchers can cancel each other out, there are sometimes several ways to reach the same result. For a chain, for example, both of these options work:
flipped under-stitch from the back side with shuttle 1
or
unflipped over-stitch from the frontside with shuttle 2
→ not reversed
If I start my simple ring with a flipped over-stitch (which means I am effectively working from the back side), I simply have to use one switcher for all the other elements as well, and I will still end up with a clean front side.
Your head is spinning now?
Don't worry. You can drive a car without knowing exactly how the engine works. In my tutorials and courses, I use a system of starting knots that automatically leads you to the correct result. You only need to remember how each element begins. I have summarized this in the following table.
| Element | flipped | under | Front | shuttle 1 |
| Simple Ring | x | x | x | x |
| chain curved upwards (smiling) | x | x | ||
| chain curved downwards | x | |||
| throw ring | x | x | ||
| Split Ring | x | x | x | x |
| Split Ring (Second Half) |
Join the right way
Have you ever made all the knots correctly, but the finished piece still looks somehow twisted?
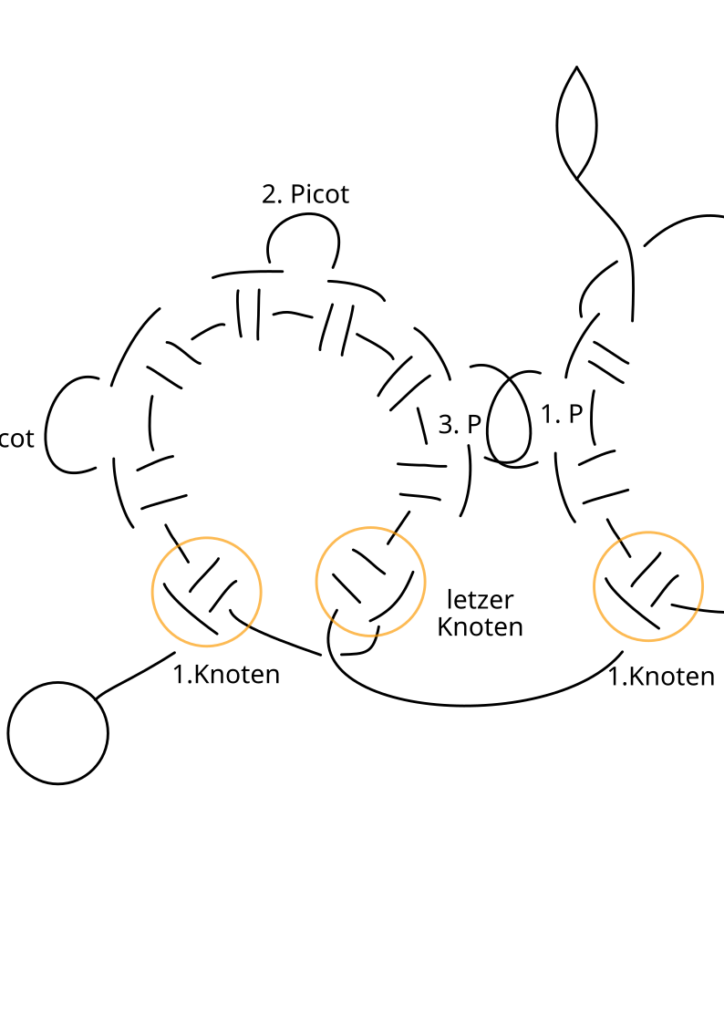
This may happen if you joined somewhere in the wrong direction. It is especially easy to make this mistake with symmetrical rings that have several picots. Looking at the finished ring, can you tell which picot you made first?
In the following illustration you can see the direction in which the ring is formed.

For a clean join between two neighboring rings, the second ring should be joined to the third picot of the first ring after the first two double stitches. This way, the rings will lie correctly afterwards.